Some time ago I came across an extraordinary thing. A small, two seat helicopter on floats in eye-catching paint scheme. As I am a great fan of seaplanes I simply had to have a scale model of this airframe in my collection. Out on the market there is only one model kit of this little helo from Khamov family. It is A Model release. The company provides rather poor quality kits, but as their subjects are quite rare, it needs only some little effort to turn these kits into exceptional miniatures. My colleagues from Russian model making forum told me that the box art name is wrong, as this particular type was called Khamov Ka-15C - not 15M. As usuall I will try to build a scale replica basing on this kit and I hope you will find it interesting.

I found a great walk around which will help me detail up my model.

I've started with thermoforming of windscreen. I used 0,12 mm PVC and 0,20 mm PET films and hot air gun.

Later I picked the best blisters to make the windscreen.

Then I cut out the engine covers.

This operation requred a smooth cut so razor saw was essential.

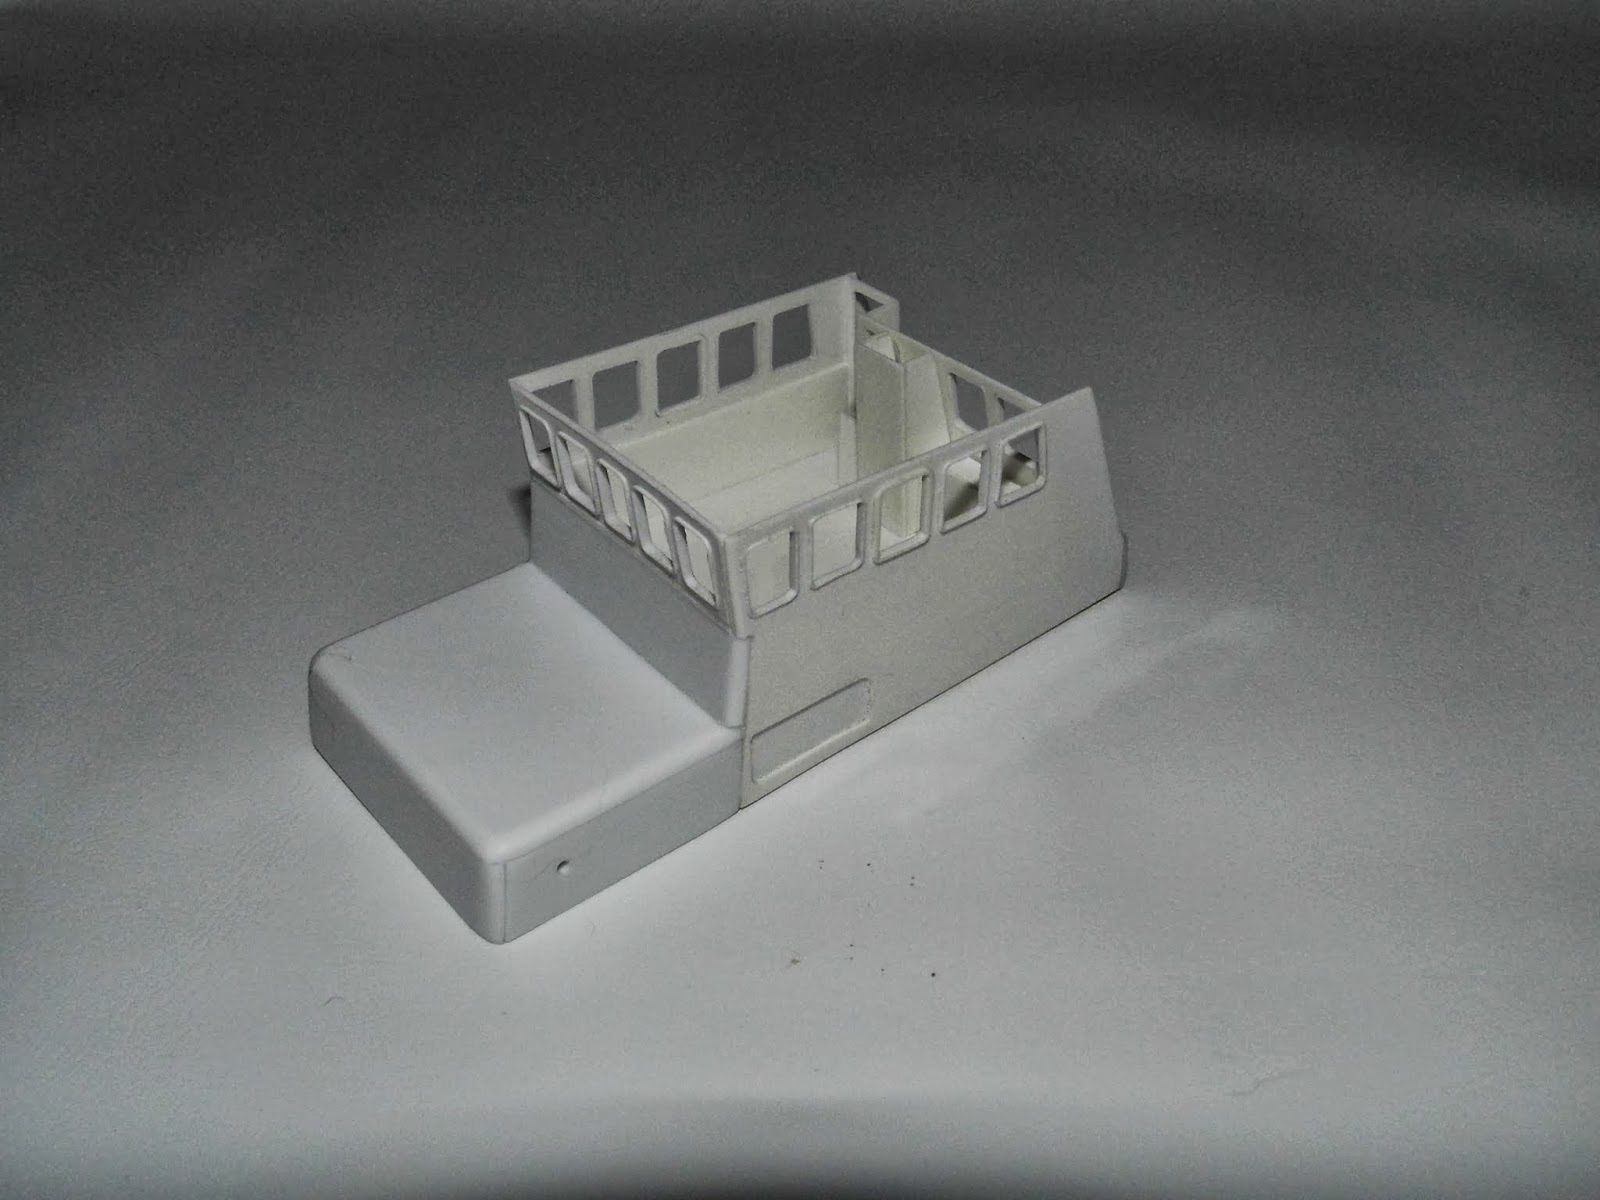
Next I've reduced the thickness of fuselage walls.

Finally I have installed a firewall which separates engine room from the cockpit.
Friday, 14 June 2013

The next thing I made was the cockpit floor. As you can see it differs much from the A model kit part. The walkaround pictures linked above were very helpful.

Here you can see the air intake opening made in front of the rotor base. I've also resculpted the opening for rotor mount.

As you can also see I made a windscreen frame. Later I decided it is too thick and removed it.

Using some old PE fret and a zirconia I have made a spotlight and its frame.

Mounted the spotlight and started applying new pannels with embossed rivets.

Fuselage belly completed.


But only after applying fine oil wash, a model gains more realistic look.


Tuesday, 27 August 2013

Next I started to detail up the cockpit interior. First I've trimmed and matched the canopy.

Then some tiny bits were added to imitate the original "front office".

Seat bases are thermoformed on a press mold.

I'm still wondering how to detail up the control pannel.

Next I added a new canopy frame made of Tamiya tape and wire.

I constantly check the fit.
Wednesday, 22 January 2014
Finally I reached to probably most exciting point of the build - to painting of the cockpit.
Spraying the base coat on all parts and fixing them into position reveals most details of the interior.
But only after applying fine oil wash, a model gains more realistic look.
After ensuring good fit, I could finally mount canopy on the fuselage.
Sunday, 23 February 2014
As the canopy is in place and cockpit secured from accidental damage, I could focus on detailing of the exterior. recently I discovered an excellent photo etched upgrade by North Star Models designed for Amodel kit. One of the main advantages of this PE set is that the smallest bits are provided in excess so even if one piece is lost there is a spare one.
First I replaced some of the bits I made myself before discovering of PE parts.
Then I made fuselage panels around engine section.
Preparing gill-like air outlets was most challenging.
Imitation of rivetting is embossed on each panel.
After ensuring good fit I stick the panel to the fuselage.
Next I have added door rails...
... and some other PE bits.
I also redesigned engine bay, so now it complies to the picture reference.
Sunday, 16 March 2014
After completing the tail boom I need to "crown" it with a stabiliser. Unfortunately the moulds of my kit are full of flash, and other excess plastic. As I have to carve the stabilisers on my own, I chose to use harder plastic.
I made all control surfaces as separate bits to represent the original in most convincing way.
Top view of the stabiliser.
Bottom view. Note the control cables attachement in the middle of horizontal stabiliser, as well as strut mount on either side.
Next I made the stabiliser support struts.
This new detail brings me a step closer to the airframe shown on the box art.
Saturday, 12 April 2014
Now it's the time to complete the fuselage with last two panels - engine covers. The bits which I cut off from the fuselage in the beginning of this project were used to make thermoforming moulds.
This way I made paper thin engine covers.
Next I had to cut out all openings. First one is ready...
... and the second one is on the way.
Next I made the imitation of rivets on both panels.
Having the rivet lines embossed, I could easily position each piece of the inner frame structure.
Then I've glued the PE mesh covers.
The last step was to add cooling flaps and hinges.